
Hello! Today I feel a bit nervous to be surrounded by so many talented makers and bloggers participating in the Make it Mine Waterfall Tour hosted by Gabriela of Chalk and Notch. I’ve been a fan of the Waterfall Raglan pattern since the girls’ pattern was released last fall. I don’t have a daughter of my own, so I immediately commented and expressed my interest in a women’s version. To my delight, she quickly obliged and has just released the Women’s Waterfall Raglan pattern. There’s nothing I love more than a well-drafted basic pattern that can be made and hacked again and again.
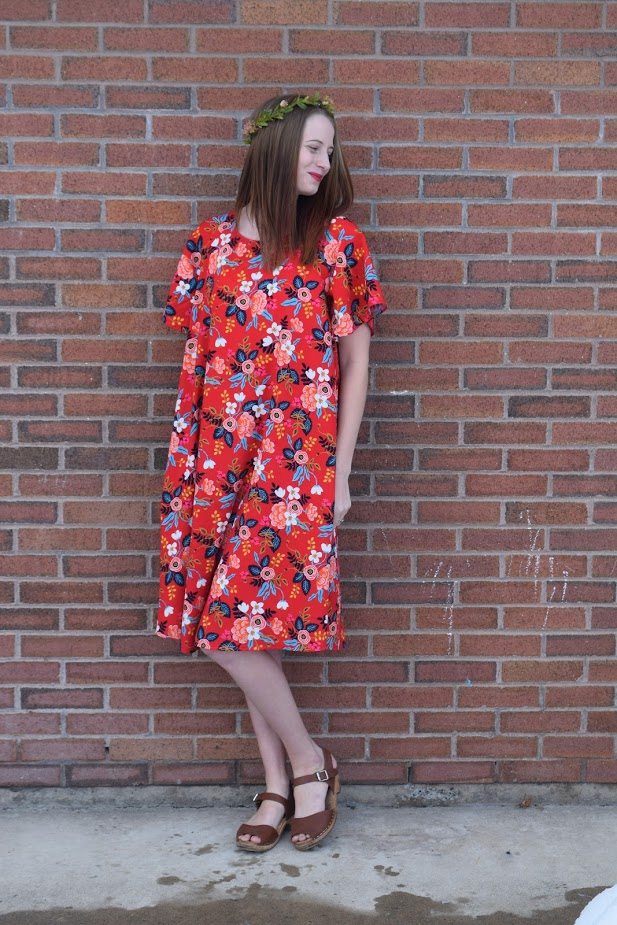
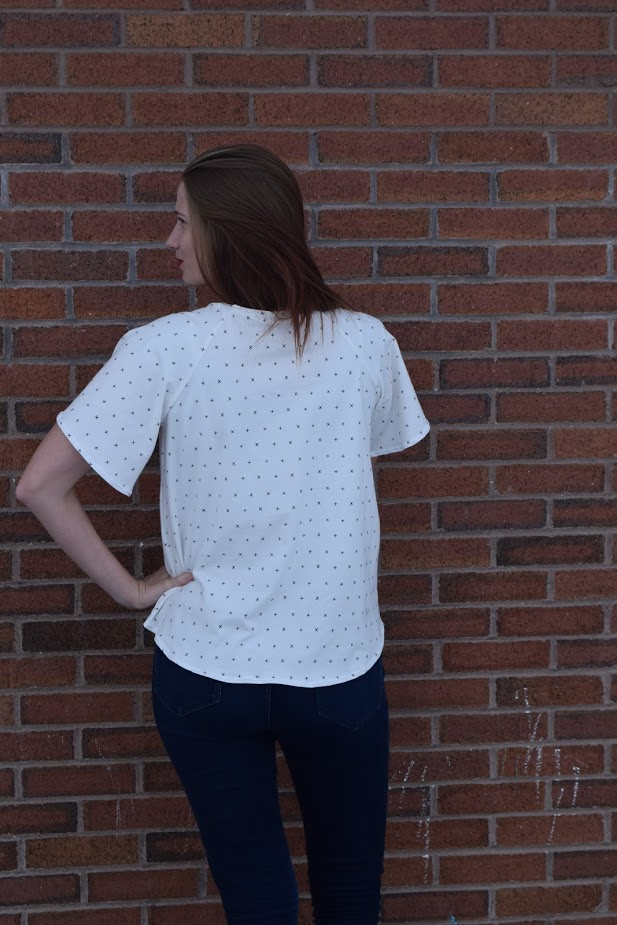
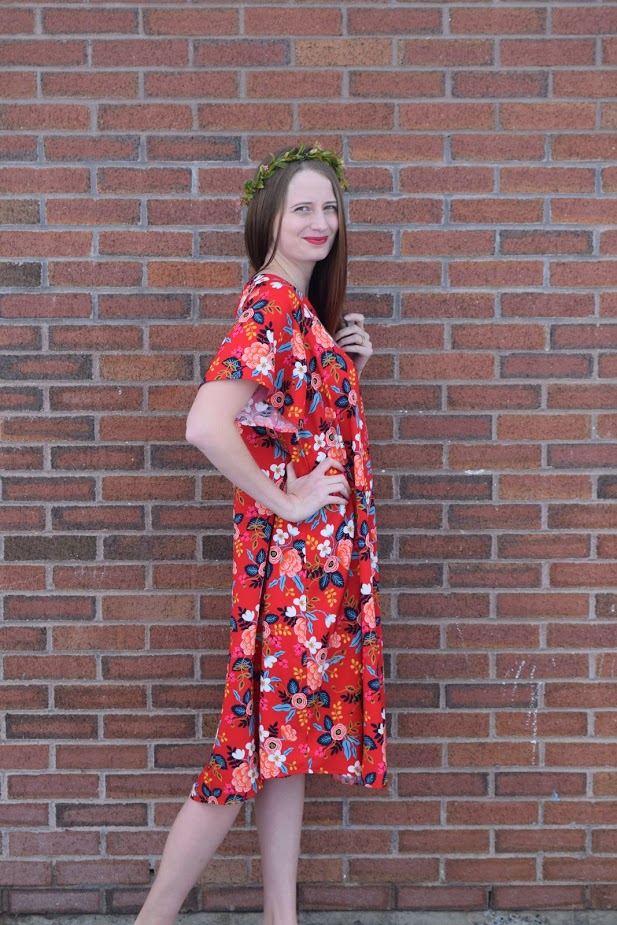
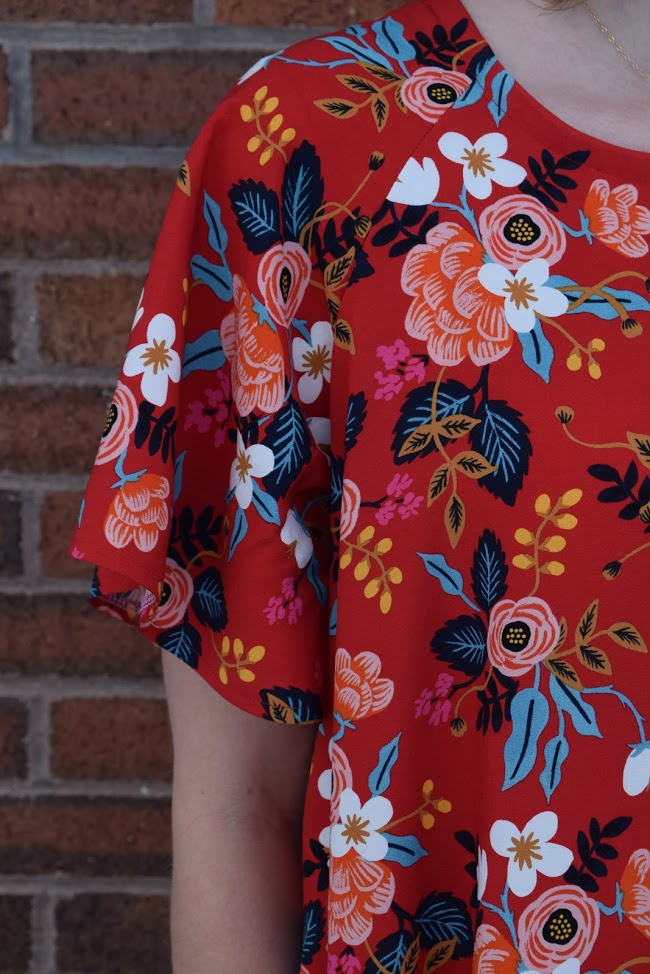
The moment I finished my first Waterfall dress, I knew that it was destined for a flutter sleeve version. I omitted the bottom ruffle as having both flutter sleeves and the ruffle seemed too girly for the desired end result. The pattern comes together so quickly that I couldn’t resist making both a dress and top version of this hack. The dress is made from Les Fleurs rayon by Rifle Paper Co. for Cotton and Steel and the top is made from a cotton/spandex knit by Art Gallery Fabrics. Both fabrics were purchased from my favorite local shop Suppose.
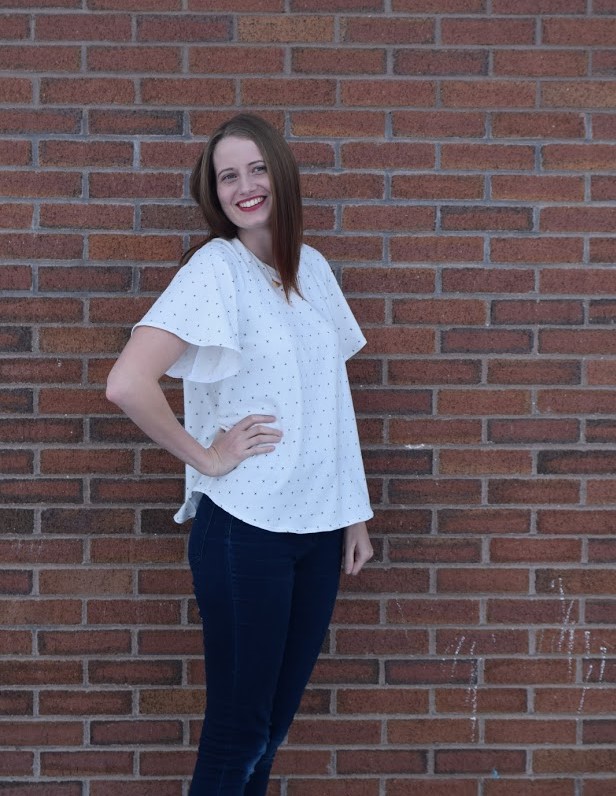
Both my top and dress have been worn multiple times since their completion last week. I love the loose flowy fit of the top and the bit of style it adds to a relaxed day look. I’m sure it will get regular wear once the weather warms up a bit.
My dress, however, is a new favorite and will likely be my go-to dress this summer. A few years ago, I used to commonly wear body-hugging fitted dresses and skirts. Then I had a child. I still love a good fitted dress, they’re just much less practical for chasing my son at church or the park and end up just sitting in my closet waiting for a special occasion. Last summer I made this dress and wore it to the zoo, park, weddings, church, etc. and loved the ease of movement and effortless style it provided. I’m looking forward to this new Les Fleurs dress providing me with the same style and ease this summer.
I’ve been putting my flat pattern drafting skills to work lately by designing a bit of children’s clothing, but was still nervous to redraft the sleeve as a flutter sleeve. It’s not something I’d attempted before and turned out to be easier than expected. Are you ready to give it a try? If so, continue reading for a tutorial on how to make your own flutter sleeve Waterfall Raglan.
Head to the end of my post for details on a couple of great giveaways. If you’re not quite ready to make your flutter sleeve dress or top, check out these other talented Make it Mine Tour ladies and their pattern hacks.
Before we begin, a quick note on sizing/alterations:
My top is made in my regular size 2 as it is made in a knit fabric recommended for this pattern. I omitted the ruffle from the top and added 3 inches to the length instead.
The dress is made in a woven fabric that has no stretch so I chose to size up two sizes to a size 6. I also omitted the ruffle on the dress and had to add a whopping eight inches to get my desired length (I’m somewhere between 5’9″ and 5’10”). I chose to do this by adding 4 inches at the dress lengthen/shorten line and 4 inches along the hemline. I removed 3/8″ from the neckline on the front, back, and sleeve pieces so that the dress would more easily slip over my head. The neckline is bound with a bias binding.
I was just barely able to squeeze this dress out of this 45″ wide fabric. If you are making a size larger than a six, it may be necessary to add a seam down the center front and center back in order to fit the pattern. There are, however, plenty of other gorgeous rayon fabrics that do come in a 58-60″ width which should work for making a woven Waterfall Raglan of your own.
Flutter Sleeve Tutorial
Supplies:
- Waterfall Raglan short sleeve pattern
- Pattern-Ease or your favorite tracing paper. Pattern-Ease is my go-to for pattern tracing because it is easy to manipulate and doesn’t rip as easily as traditional tracing paper. You can purchase it here or look for it at your local fabric shop.
- 4-6 pages of 8.5″x 11″ printer paper.
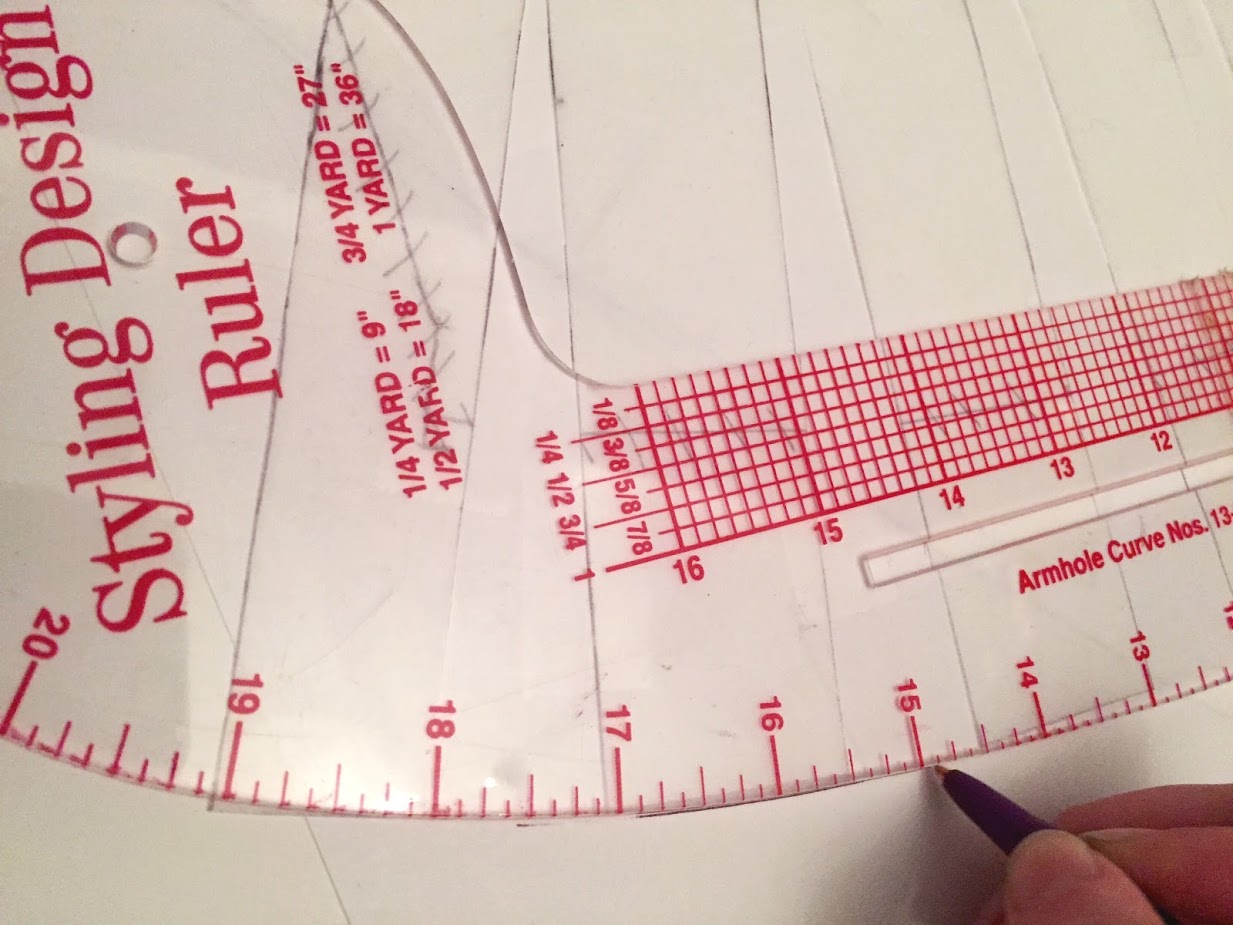
- Styling Design Ruler (You can get away with using a regular ruler for this hack, using a Styling Design Ruler just makes it a bit easier).
- Pen or pencil
- Scissors
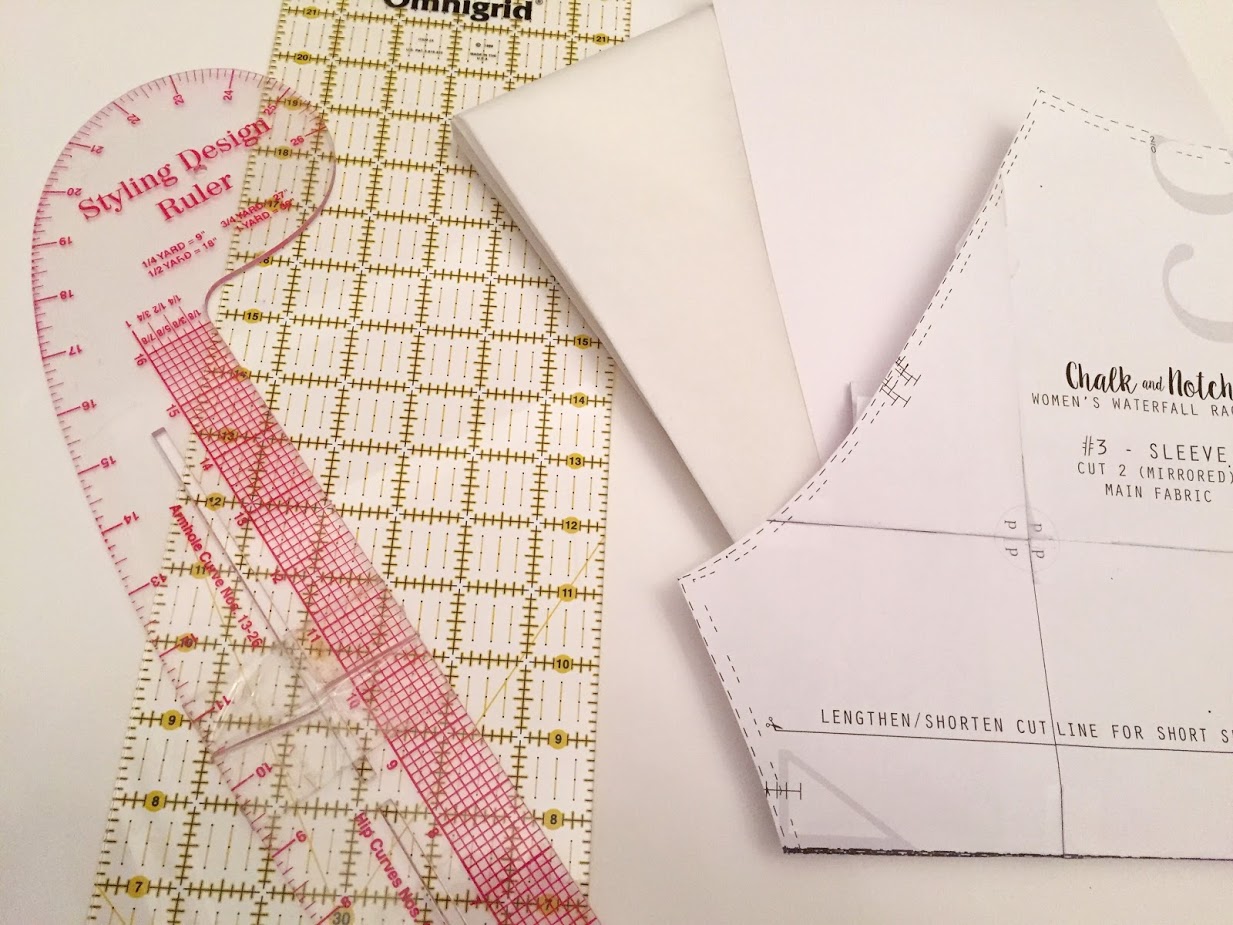
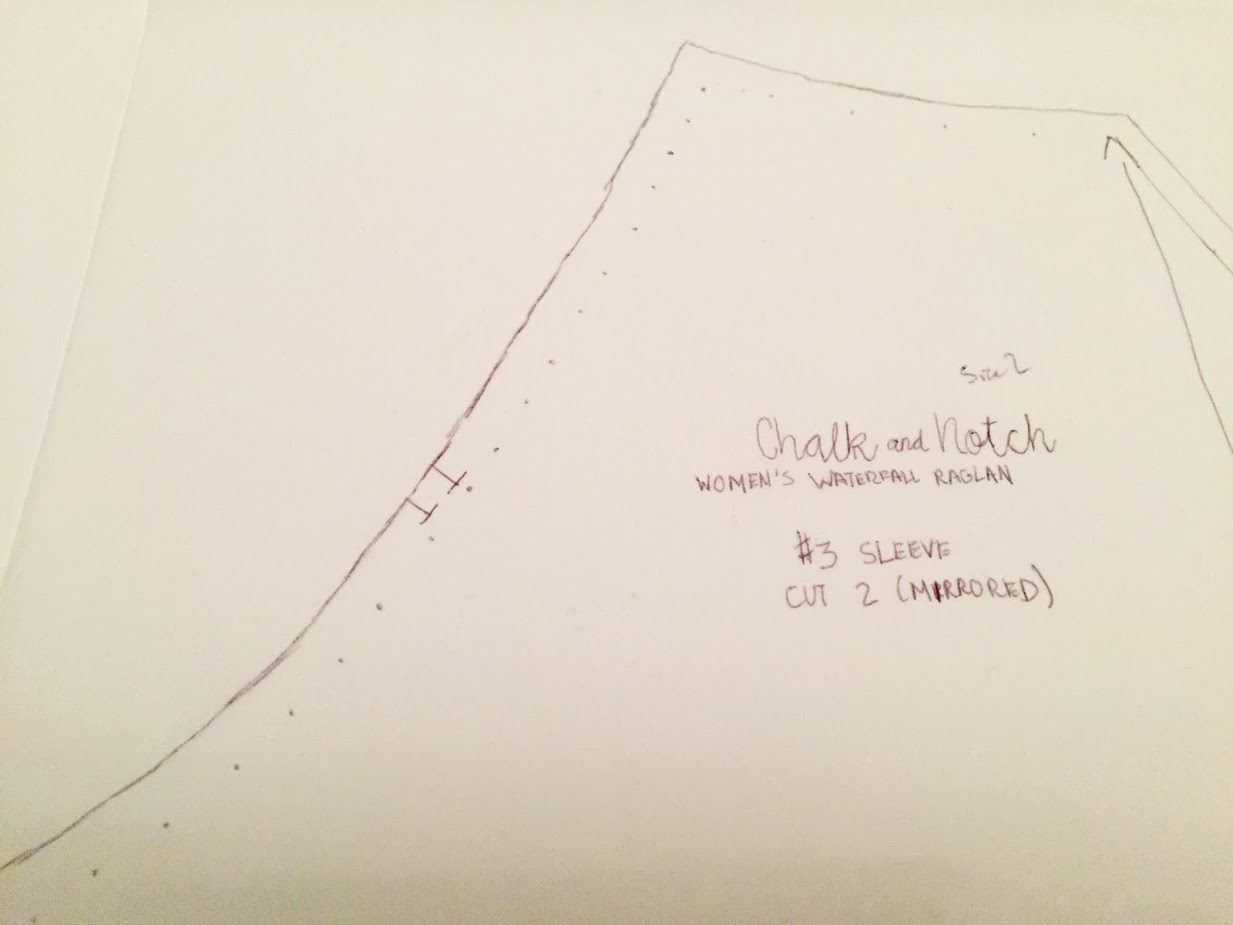
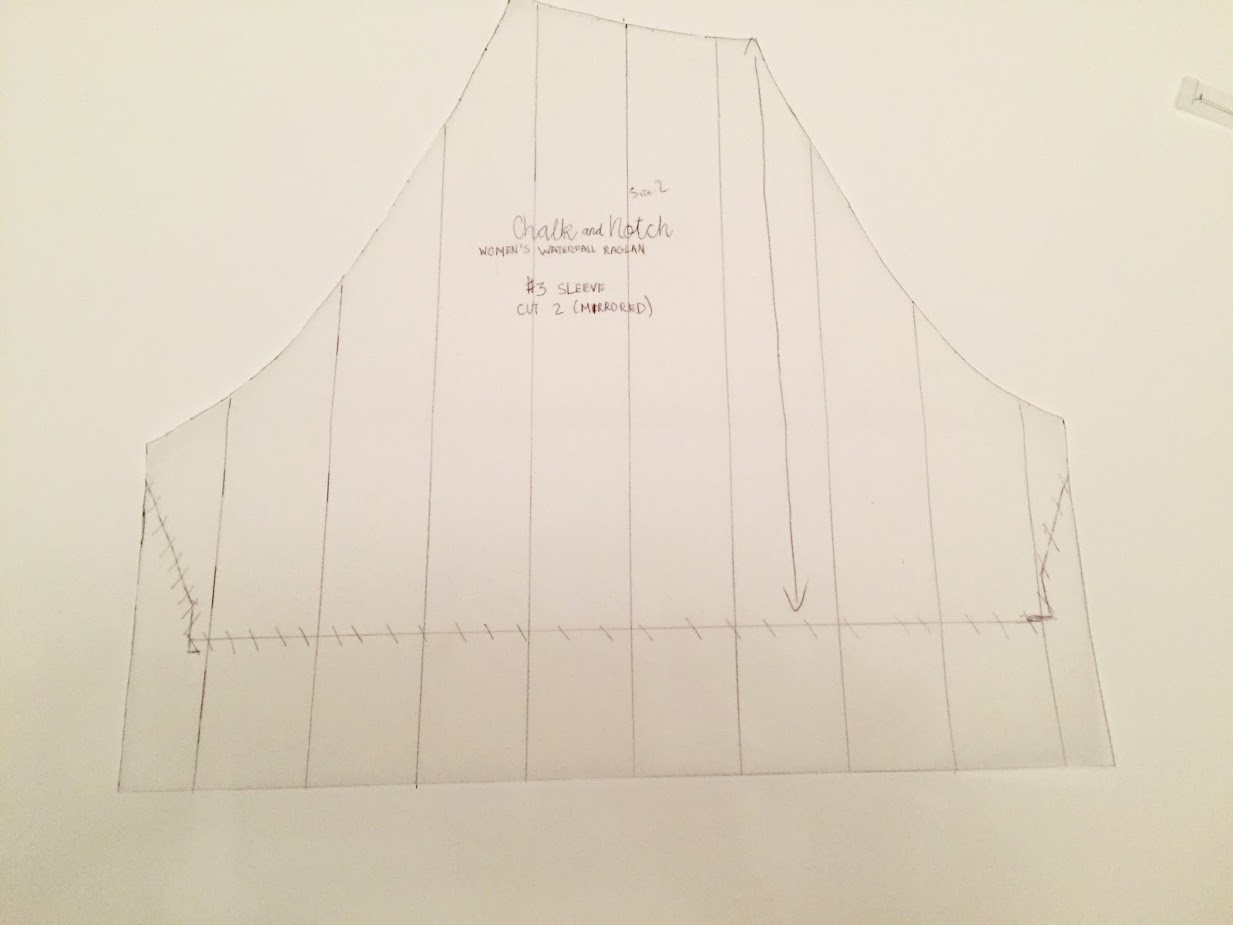
Step 1: Trace your short sleeve pattern onto your Pattern-Ease or tracing paper.
Step 2: Draw a 5 and 1/4″ line straight down from the underarm corners on both the front and back of the sleeve. Connect those two lines at the bottom with a line that is perpendicular to both. This is your new sleeve length. It will add a bit of fullness and also make drafting the flutter sleeve a bit easier.

Step 3: Remove seam allowances. The seam allowances for the Waterfall Raglan are 3/8″ (1cm). I like to do this by drawing dots or dashes along the actual seam line all the way around the inside of the pattern piece (see photo below). I then connect the dots or dashes to indicate the seam line.
Step 4: Cut off seam allowances. This will help eliminate confusion during the alteration process.
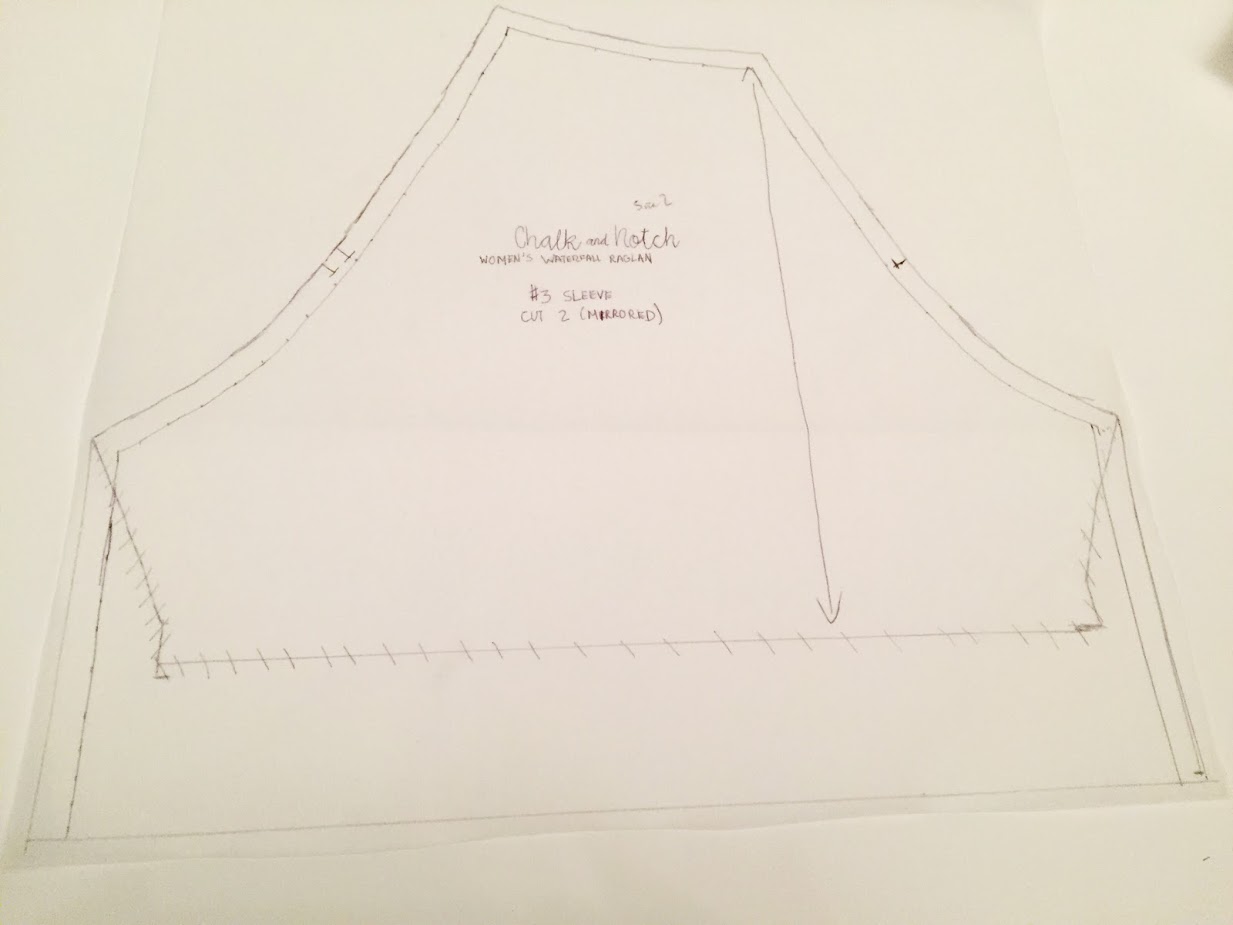
Step 5: Find the center of your sleeve pattern and draw a vertical line from top to bottom at the center points.
Step 6: Starting at the newly drawn center line, draw a parallel line 1.5″ to the right. Continue drawing lines 1.5″ apart until you reach the right edge of the sleeve pattern. Repeat for the left side.
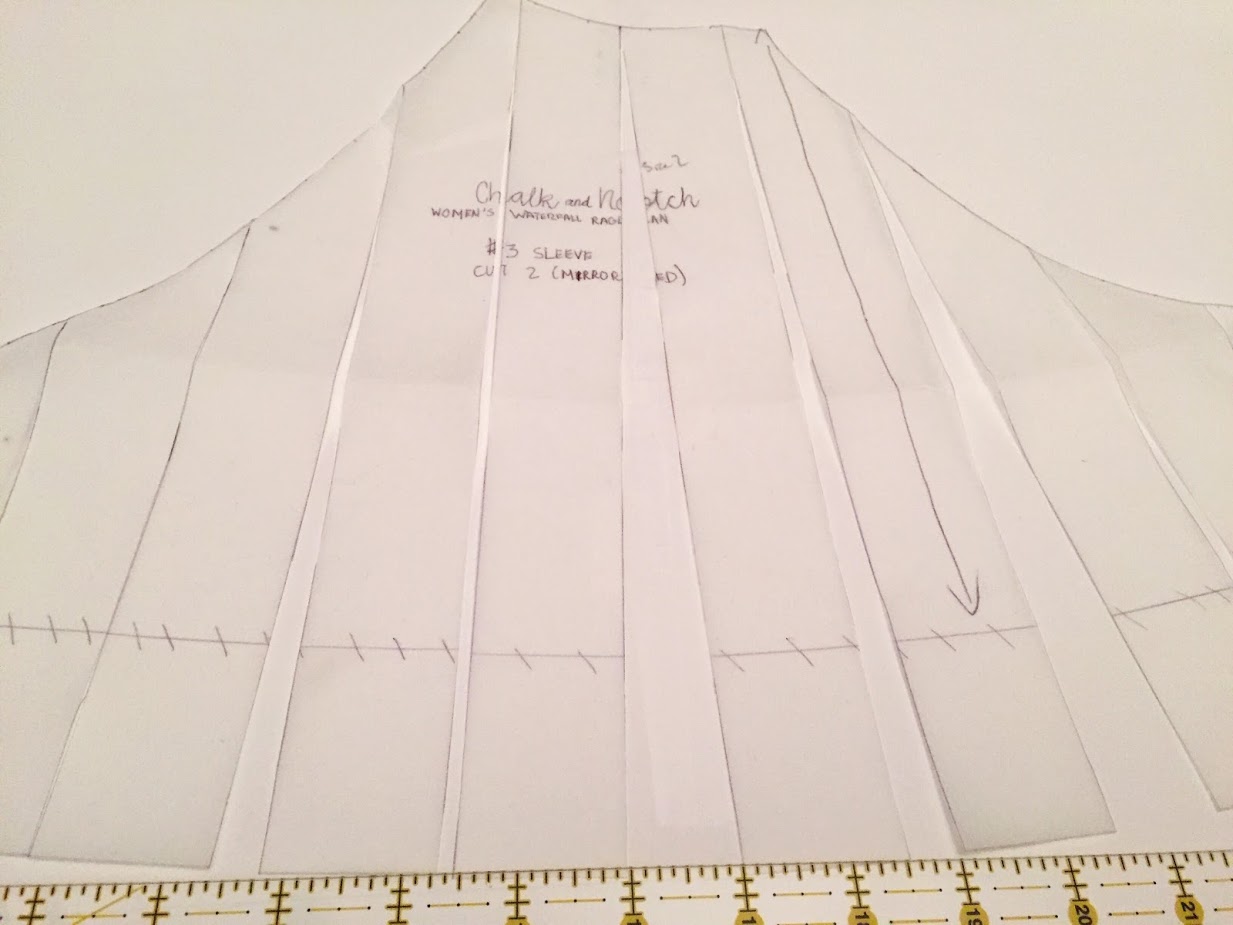
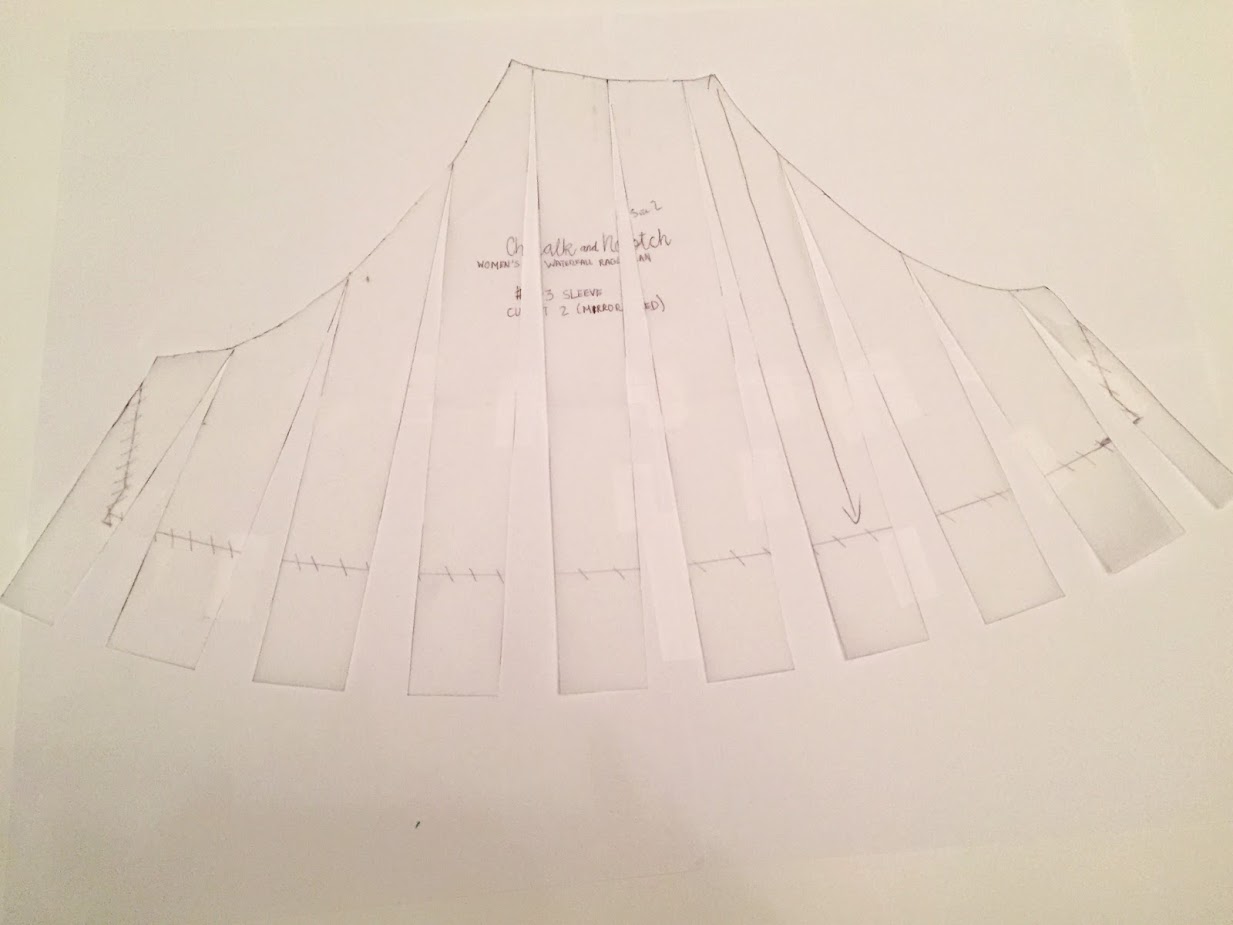
Step 7: Beginning at the bottom of your newly drawn horizontal lines, cut all the way to, but not through, the top of the sleeve (side note: every time I have to do this I hear my college professor’s voice in my head repeating “cut to it, not through it” over and over again until I have cut the line successfully). It’s okay if you accidentally cut all the way through the seam line. Just add a tiny piece of tape at the top to hold it together.
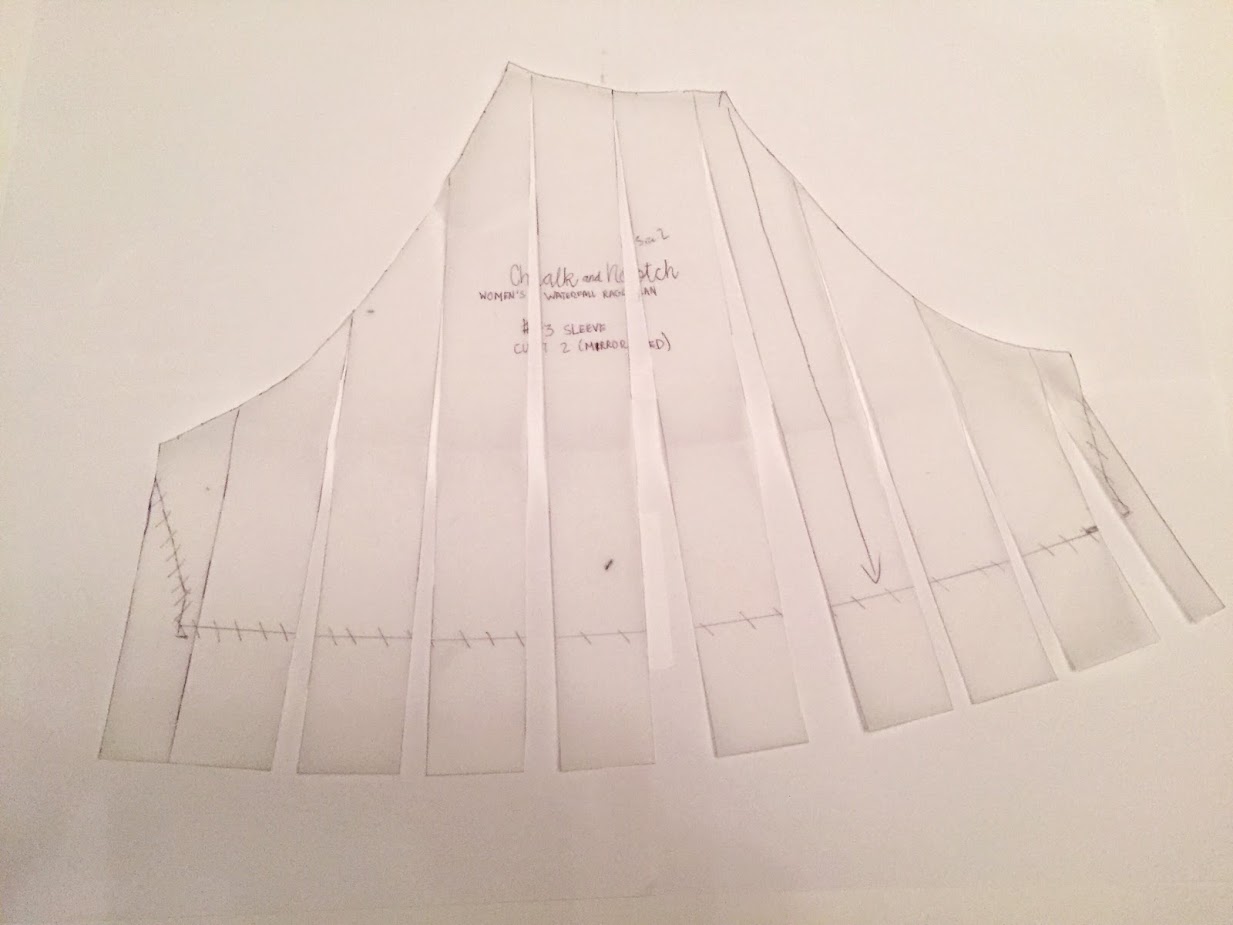
Step 8: Place your cut sleeve pattern on a larger piece of tracing paper, or just regular printer paper. I simply taped about 4 pieces of printer paper together and used that as a sturdy base for my newly drafted sleeve.
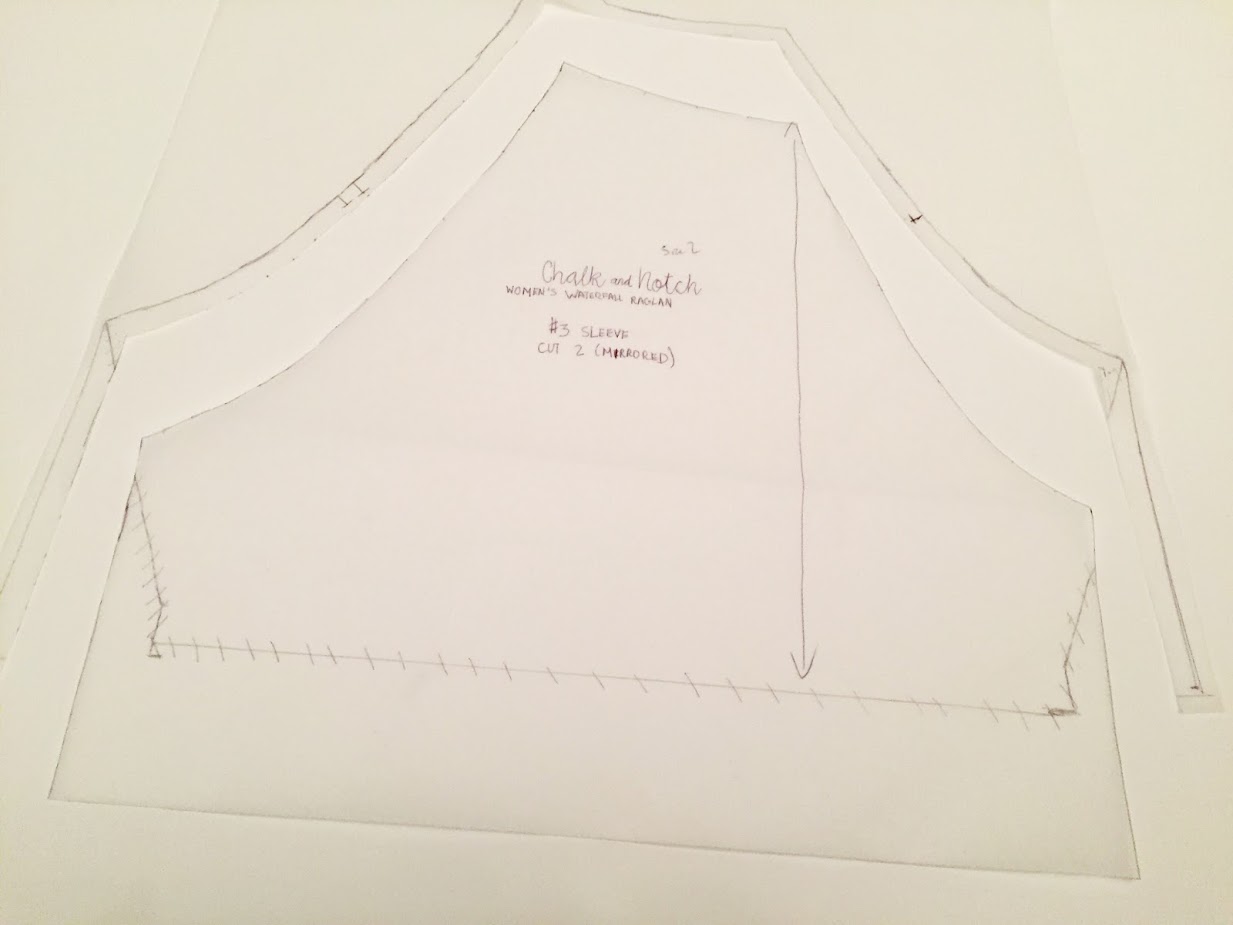
Step 9: Starting at the cut center line, place a tiny piece of tape at the top of the seam line. This will help keep the pattern in place as you manipulate the fullness. At the open end of your cut line. Separate the two sides of your line by 1″. Tape in place. Working out from the center, repeat for remaining cut lines.
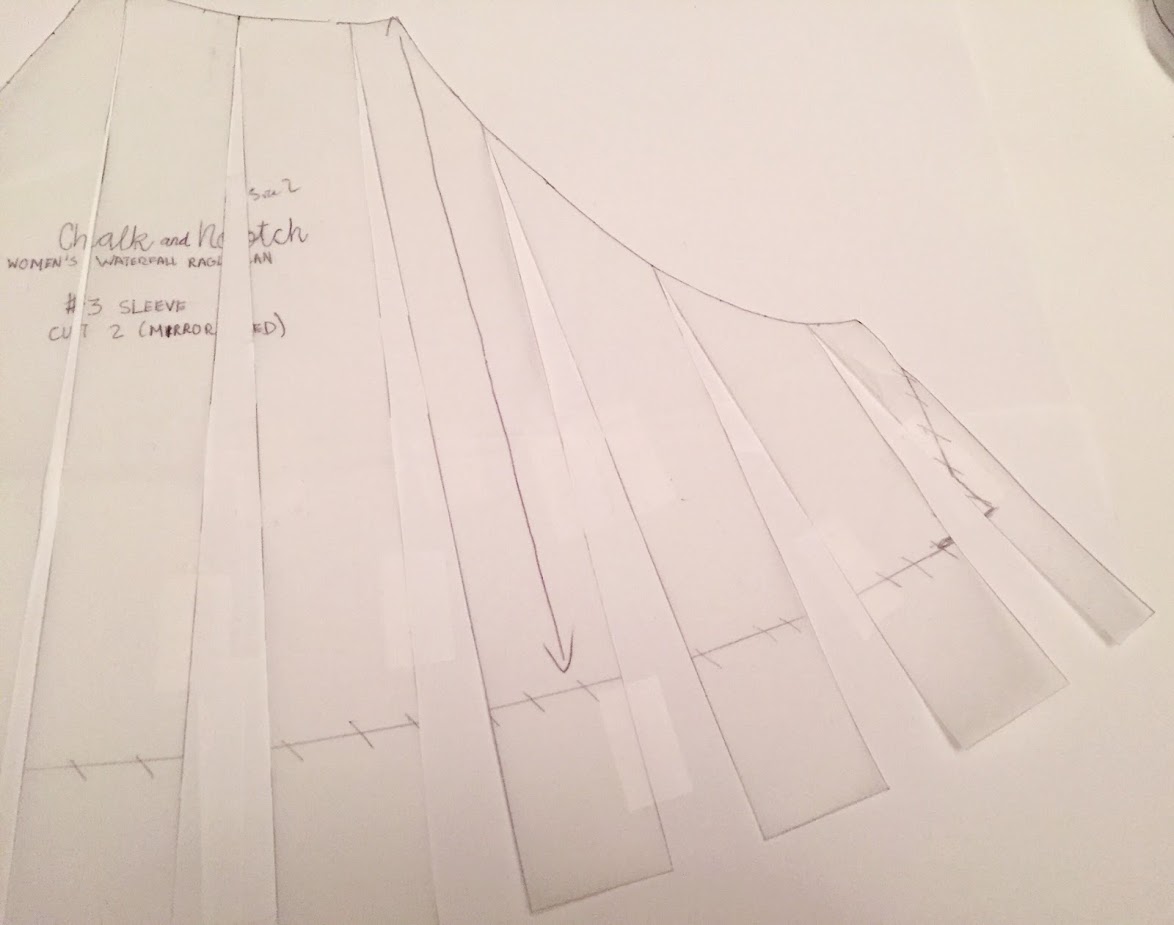
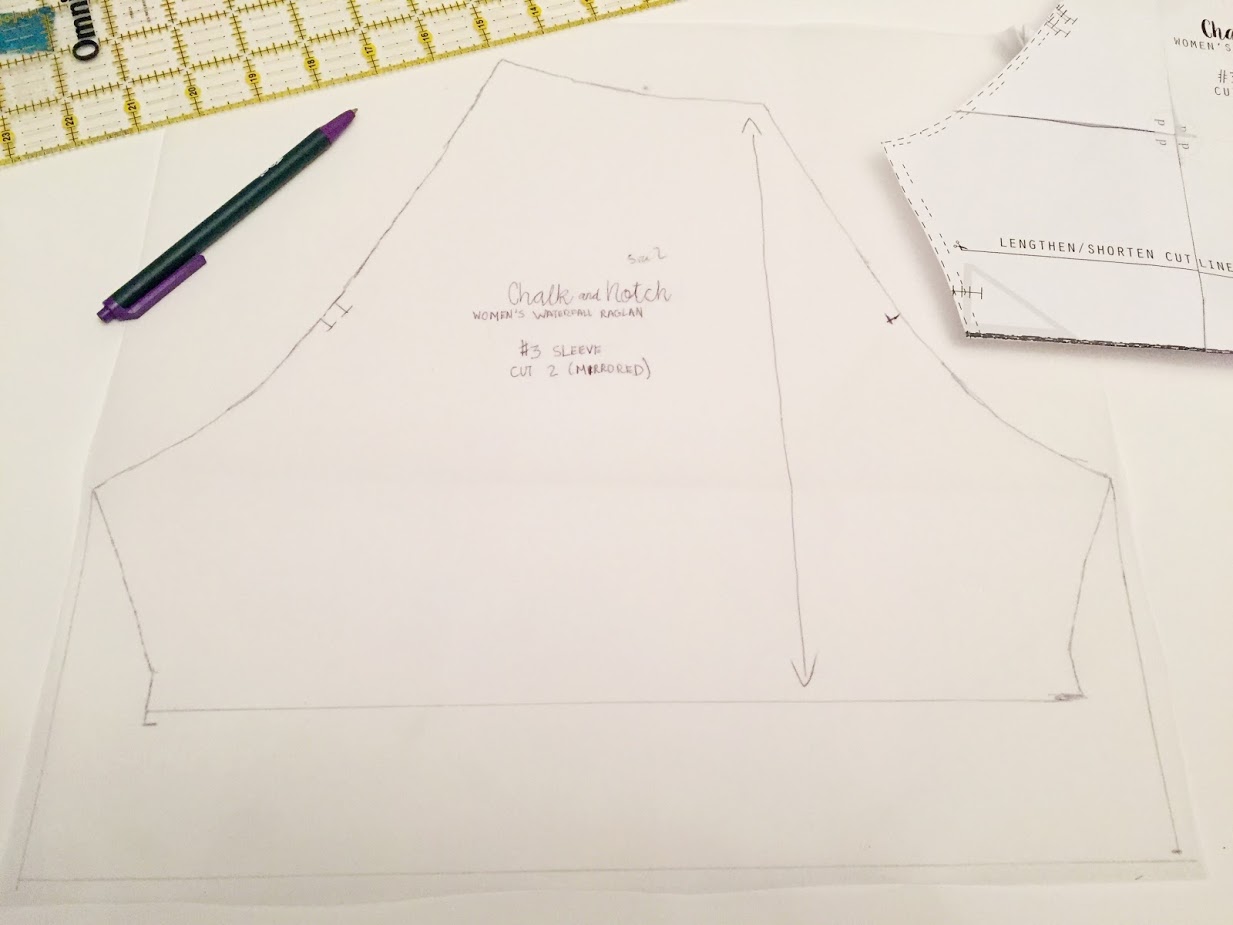
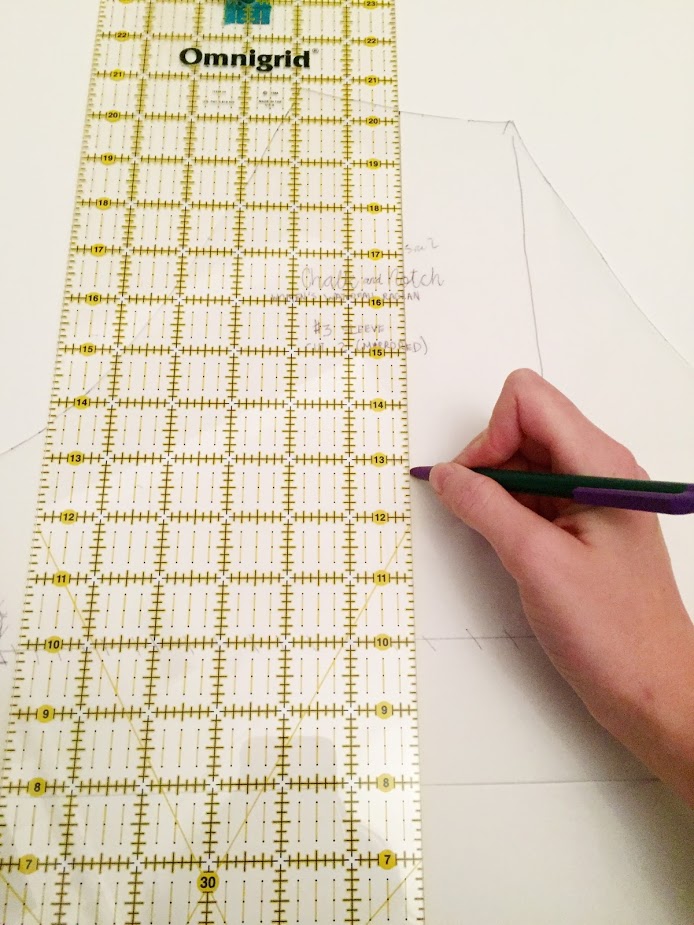
Step 10: Your sleeve should now look like the photo above. Use a Styling Design ruler or your excellent connect the dots skills to follow the curve of your newly drafted sleeve and redraw your hemline.
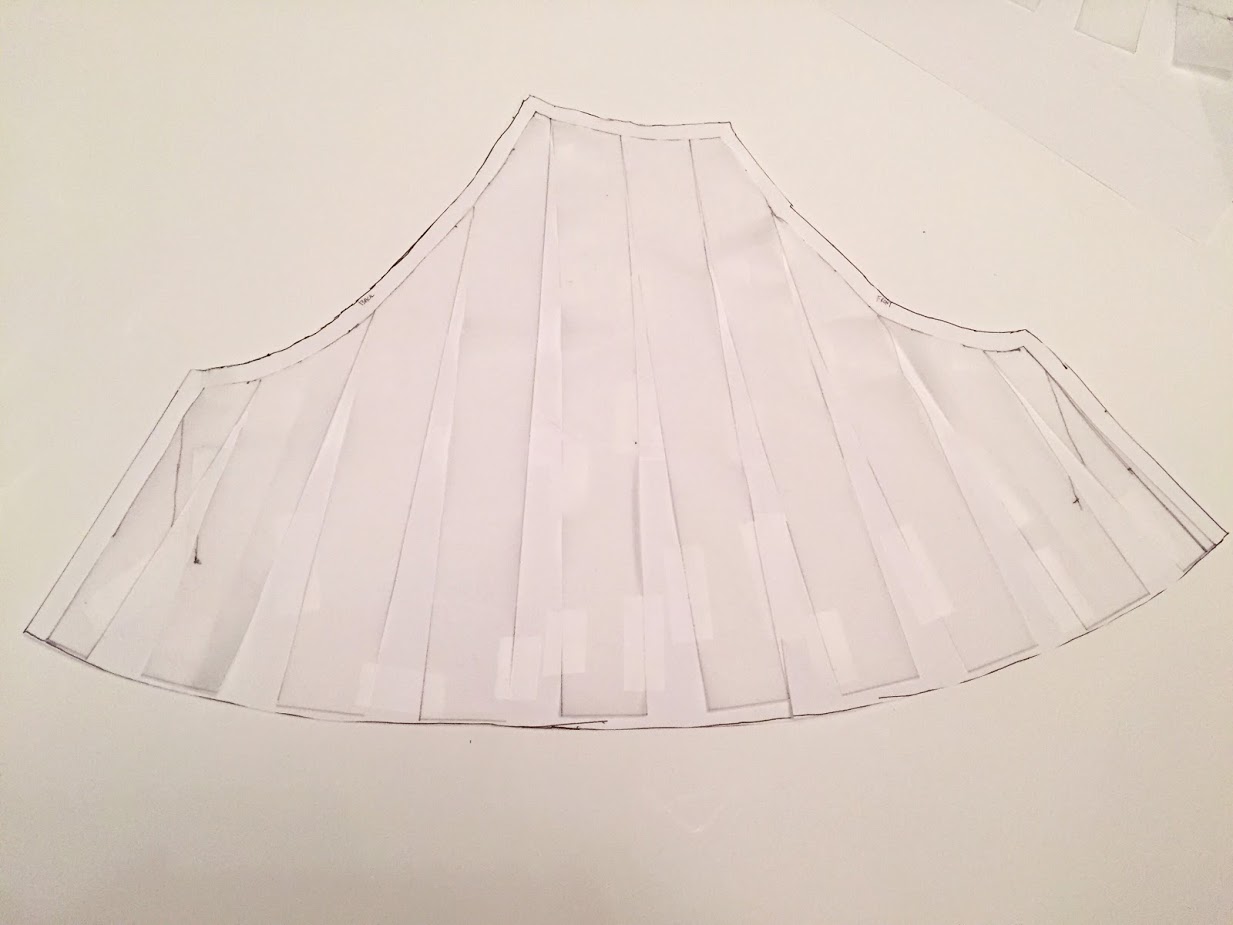
Step 11: Add seam allowances back to top and sides of sleeve. It should look like the sleeve pattern pictured below. Cut out new sleeve pattern.
Step 12: Use your new sleeve pattern to cut two mirror images of main fabric. Follow instructions in the Waterfall Raglan pattern for assembling your new top or dress. Remember to omit the ruffle. Hem sleeves at 3/8″. Press, wear, and enjoy!

Whew! This is officially the longest post/tutorial I’ve ever written. Thanks for sticking with me. Above is a peek into what it’s really like taking blog photos while your 3 year old is just out of the frame.
Don’t forget to enter one or both of the great giveaways happening now in conjunction with the Make it Mine tour.
First, you can enter to win $50 to Stylish Fabric through the link-up party by following these instructions:
– Sew a Waterfall Raglan, Women’s or Girls, in any fabric.
– Post a photo on Instagram, Facebook or on your Blog and link it to the Chalk and Notch post found here.
– Make sure to use the hashtag #makeitminelinkup in your post and tag @chalkandnotch & @stylishfabrics so we can see it. Giveaway ends February 12th.
Second, enter to win an amazing 5 pack of patterns that complement the Waterfall Raglan. I now need to own all of these and really want to make the Birkin Flares to go with my new top. The five patterns included are:
The Birkin Flares by Baste and Gather
The Carrie Cardigan by Delia Creates
Sloan Leggings by Hey June
Brenna Coat by Cali Faye
ooh La Leggings by Papercut Patterns

Follow this Rafflecopter link to enter.
This is a great tutorial! My yongest asked for a matching dress to yours! It’s a stunner!
Thank you! This would be darling on a little girl. I’m actually making this exact dress in a 12 month size for my niece because I had just enough fabric left over for a baby dress.
So beautiful! I love that the sleeves are longer also.
Thank you!
So cute! I love the flutter sleeves, such a great tutorial!
Thank you friend!
So beautiful Nicole! That dress is absolutely amazing. Thanks for the great tutorial too- I can’t wait to add flutter sleeves to a Waterfall Dress for my girls!
Thank you! I’d love to see this done on a girls’ dress.
Awsome dress! I will do another waterfall raglan with this sleeves! Thanks for the tutorial!!
Thank you for reading!
I have been so looking forward to your blog post ever since I saw your gorgeous dress, and finally got a chance to sit down this morning! I didn’t see the “continue reading” on your main page when I was skimming ahead at first and had a mini freak-out when I thought you actually hadn’t done a tutorial, haha. Once I calmed down, I could read the whole thing, phew. THANK YOU for the tutorial! I think I want one of those rulers, now…
Thank you Emi! I usually don’t do the continue reading thing, but this tutorial was just so long it seemed to warrant it. I’m glad you found it! Yes, the ruler is very helpful if you plan on doing a bit of alterations and/or drafting from time to time. I’ve had one for about six years now and it’s served me well.